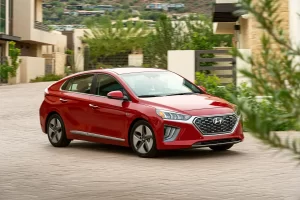
Off-Grid Solar Charging Setups for Electric Campervans

There’s something almost magical about pulling into a remote canyon at golden hour, killing the engine, and listening to… absolutely nothing. No generator hum. No campground hookup anxiety. Just you, the wind, and a fully charged battery bank humming quietly beneath the floorboards. That’s the promise of off-grid solar for electric campervans — and honestly, it’s more attainable than most people think.

But here’s the thing: slapping a couple of panels on the roof and hoping for the best? That’s a recipe for cold coffee and a dead laptop. You need a system that actually works with your van’s electrical architecture. Let’s break down what matters, what doesn’t, and how to build a setup that feels less like a science project and more like freedom.

First, Understand Your Van’s Appetite

Before you buy a single panel, you’ve got to know how much juice you’re actually consuming. Think of it like meal prepping — you wouldn’t cook a week’s worth of food without knowing how hungry you are. Same logic applies here.

Start with a simple energy audit. List every device you’ll charge or run daily: phone, fridge, laptop, LED lights, maybe a small induction cooktop. Multiply each device’s wattage by the hours you’ll use it. That gives you watt-hours per day. For most vanlifers, that number lands somewhere between 800Wh and 2,000Wh. A typical electric campervan — one with a 5kWh auxiliary battery — has about 4,000 to 4,500 usable watt-hours (thanks to depth-of-discharge limits).

So, if you use 1,200Wh daily, you’ve got roughly 3 days of buffer with zero sun. That’s your baseline. Now, let’s make sure the sun can fill that hole.

Solar Panels: The Roof Is Your Real Estate

Roof space is precious — and it’s finite. On a standard 6-meter campervan, you’re looking at roughly 4 to 6 square meters of usable flat roof. That’s where flexible panels shine… or, well, they don’t shine — they just sit there quietly converting photons.

Here’s the deal: rigid panels (the glass ones) are more efficient per square meter, typically 20% to 22% efficiency. Flexible panels are lighter and hug the roof curve, but they run about 15% to 18% efficiency and tend to heat up faster, which reduces output. For most builds, a hybrid approach works best — rigid panels where the roof is flat, flexible ones near the edges or over slight curves.

In terms of wattage, you’re usually looking at 300W to 600W total on a campervan roof. That might sound modest, but with a good charge controller, 400W can generate around 1.6 to 2.0 kWh per day in decent sun. That covers the baseline for most minimalists.

Monocrystalline vs. Polycrystalline — Just Go Mono

Honestly, don’t overthink this one. Monocrystalline panels are more efficient, look sleeker (all black), and perform slightly better in low-light conditions. Poly is cheaper but bulkier for the same output. For a van, space is king — so mono wins, every time.

The Charge Controller: Your System’s Brain

Solar panels are like wild horses — they produce voltage that fluctuates with cloud cover, temperature, and angle. You need a controller to tame that flow and feed your battery a steady, safe charge. Two main types exist: PWM (Pulse Width Modulation) and MPPT (Maximum Power Point Tracking).

If you’re building anything over 200W, skip PWM. It’s older tech, less efficient, and basically wastes the extra voltage your panels produce. MPPT is the way to go. It converts excess voltage into extra current, which means you can squeeze up to 30% more usable power from the same panels — especially in cooler weather or partial shade.

A good MPPT controller, like a Victron SmartSolar or EPEver, will also log data via Bluetooth. That’s huge for monitoring — you can see exactly how many amp-hours you’ve pulled in today, and adjust your habits accordingly.

Battery Bank: The Heart of the Matter

Your batteries are where the magic happens. You can have a thousand watts of solar, but if your battery can’t hold a charge or charge fast enough, you’re dead in the water.

For electric campervans, lithium iron phosphate (LiFePO4) is the undisputed champion. Why? Three reasons: depth of discharge (you can safely use 80% to 90% of capacity), charge efficiency (over 95% vs. 80% for lead-acid), and cycle life (2,000 to 5,000 cycles vs. 500 for AGM).

A 200Ah LiFePO4 battery at 12V gives you about 2,400Wh of usable energy. That’s plenty for a weekend off-grid, or a full week if you’re conservative. Pair it with 400W of solar, and you’ve got a system that can sustain itself indefinitely in most climates.

Voltage Matching: 12V vs. 24V Systems

Here’s a subtle but critical point. Most campervans run 12V systems because that’s what the alternator and most appliances use. But if you’re building a larger system — say, over 3kW — 24V makes more sense. Why? Lower current means thinner cables, less voltage drop, and smaller charge controllers. But honestly, for most builds under 5kWh, stick with 12V. It’s simpler, cheaper, and you avoid needing a DC-DC converter for every accessory.

Wiring, Fuses, and the Unsexy Stuff

Nobody wants to talk about cable gauge, but it’s the difference between a system that works and one that catches fire. Seriously. Undersized wires cause voltage drop, which means your panels produce less power than they should — and in worst cases, wires overheat.

Use this rule of thumb: for a 12V system, keep voltage drop under 3%. That means 10 AWG wire for runs up to 15 feet with 20A of current, 8 AWG for 30A, and so on. When in doubt, go one size up. Copper is cheap; a fire is not.

Also, every single positive wire needs a fuse or breaker within 12 inches of the battery. No exceptions. Use ANL fuses for the main battery line, and blade fuses for smaller circuits. It’s tedious, but it’s the kind of thing that makes you sleep better in a thunderstorm.

Real-World Setup: A 400W / 200Ah Example

Let’s make this concrete. Here’s a typical setup that works for most electric campervans:

  • Panels: 2 x 200W rigid monocrystalline on the roof, angled slightly toward the equator.
  • Controller: Victron SmartSolar MPPT 100/30 (handles up to 440W at 12V).
  • Battery: 1 x 200Ah LiFePO4 (2.4kWh usable) or 2 x 100Ah in parallel.
  • Inverter: 1,000W pure sine wave for occasional AC loads (laptop, blender).
  • Monitoring: Victron SmartShunt for battery state-of-charge.
  • Alternator charging: DC-DC charger (30A) to top up while driving.

With this setup, you’re looking at roughly 1.6 to 2.0 kWh of solar generation per day in summer, and maybe 0.8 to 1.2 kWh in winter. That’s enough to run a 12V fridge (about 400Wh/day), charge phones and laptops (200Wh/day), and still have juice for lights and a water pump.

Shade, Weather, and the Reality of Clouds

Let’s get real for a second. Solar is wonderful, but it’s not magic. A week of overcast skies in the Pacific Northwest can cut your generation by 60% to 70%. That’s why you need a backup plan — and no, I don’t mean a noisy generator.

Your alternator is your best friend. A DC-DC charger (like a Renogy DCC50S or Victron Orion) lets you charge your house battery while driving. On a long drive day, you can easily add 30 to 50 amp-hours — that’s 360 to 600Wh — just from the engine. It’s not glamorous, but it’s reliable.

Also, consider portable solar panels. A foldable 100W or 200W panel (like the Jackery SolarSaga or Bluetti PV200) can be deployed at camp, angled toward the sun, and packed away when you leave. It’s a game-changer for shaded campsites. You lose the convenience of rooftop, but you gain flexibility.

Monitoring and Habits: The Invisible Half

Here’s a truth that’s hard to swallow: most solar failures aren’t technical — they’re behavioral. People run their fridge on max, leave the inverter on all day, and then wonder why they’re at 20% by noon.

Get a monitoring system. A shunt (like the Victron SmartShunt) measures current in and out of your battery, giving you a precise state-of-charge. Pair that with the Victron app, and you’ll start to see patterns. You’ll notice that the fridge draws 1.2A in summer but 2.1A in winter (because it works harder). You’ll see that your laptop charger pulls 65W, and that’s fine — but leaving it plugged in overnight is wasteful.

Small habit shifts — like pre-cooling the fridge before a sunny day, or charging devices during peak sun hours — can easily double your effective autonomy. It’s not about deprivation; it’s about timing.

Common Mistakes (And How to Avoid Them)

I’ve seen a lot of builds, and honestly, the same three mistakes keep popping up:

  1. Overpaneling without battery capacity. You can’t store what you don’t have. If you have 600W of solar but only 100Ah of battery, you’ll waste a ton of generation on sunny days.
  2. <

SR-22 Insurance for Non-Owners: What It Is and How It Works

Let’s be real—if you’ve heard the term “SR-22 insurance,” you probably already know it’s not exactly a party. It’s usually tied to a DUI, a reckless driving charge, or maybe a few too many tickets. But here’s the kicker: what if you don’t even own a car? That’s where SR-22 insurance for non-owners comes in. And honestly, it’s one of those things that sounds way more complicated than it actually is.

So, grab a coffee—or tea, I don’t judge—and let’s untangle this together. No jargon bombs, no sales pitch. Just the facts, with a little bit of real talk.

First Things First: What Exactly Is an SR-22?

Okay, so here’s the deal: an SR-22 isn’t actually insurance. I know, the name is misleading. It’s a certificate—a form, really—that your insurance company files with your state’s DMV to prove you have the minimum liability coverage required by law. Think of it like a financial responsibility guarantee. You screw up on the road, and the state wants proof you’re covered before they let you drive again.

Now, for non-owners, it’s the same concept—but without the car. You’re proving you have insurance even though you don’t own a vehicle. Makes sense, right? The state doesn’t care if you borrow a friend’s car or rent one; they just want to know you’re insured when you’re behind the wheel.

Who Actually Needs Non-Owner SR-22 Insurance?

Honestly, it’s more common than you’d think. Here’s who typically falls into this category:

  • People who lost their license due to a DUI or DWI—and they don’t own a car. Maybe they live in a city with good public transit, or they just can’t afford one right now.
  • Drivers with a history of multiple traffic violations—like speeding tickets or at-fault accidents—who need to reinstate their license but don’t have a vehicle.
  • Someone who got caught driving without insurance—yeah, that’s a thing. The state might require an SR-22 even if you never owned a car.
  • People who had a license suspension for other reasons—like unpaid child support or a medical condition. It’s not always about bad driving.

So, yeah—it’s not just for “bad drivers.” It’s for anyone who needs to prove financial responsibility but doesn’t have a car to insure.

Wait—Can You Really Get Insurance Without a Car?

Sure can. Non-owner car insurance is a specific policy designed for people who drive occasionally but don’t own a vehicle. It covers liability—meaning if you cause an accident, it pays for the other person’s injuries or property damage. It does not cover your own injuries or damage to the car you’re driving (since you don’t own it). That’s usually covered by the car owner’s policy, but the SR-22 is your safety net.

And here’s a little nuance: some states call it an “operator’s policy” or “non-owner liability policy.” Same thing, different name.

How Does Non-Owner SR-22 Insurance Work in Practice?

Let’s paint a picture. Say you borrow your buddy’s truck to move a couch. You’re driving, you accidentally rear-end someone at a stoplight. Your buddy’s insurance might cover the damage—but if his policy has limits, or if he has a high deductible, you could be on the hook. With a non-owner SR-22 policy, your liability coverage kicks in as secondary insurance. It’s like having a backup parachute.

Plus, the SR-22 filing itself is what keeps your license valid. Without it, the state can suspend your driving privileges again. So, it’s not just about the coverage—it’s about compliance.

How Much Does It Cost? (Spoiler: It’s Not Cheap, But It’s Manageable)

Alright, let’s talk numbers. Non-owner SR-22 insurance is generally cheaper than standard SR-22 insurance for car owners—because you’re not insuring a vehicle. But it’s still more expensive than a regular non-owner policy because of the SR-22 filing fee.

Here’s a rough breakdown:

Cost ComponentTypical Range
Non-owner liability policy (per year)$300 – $800
SR-22 filing fee (one-time)$15 – $50
Monthly premium (average)$30 – $70

But—and this is a big but—your rates depend on your driving record, age, location, and the insurer. If you have a DUI, expect to pay more. If you’re in a high-risk state like California or Florida, premiums might be higher too. Shop around. Seriously, get at least three quotes.

Pro Tip: Don’t Let the Policy Lapse

Here’s where people mess up. If your non-owner SR-22 policy lapses—even for a day—the insurance company is required to notify the DMV. And the DMV? They’ll suspend your license again. It’s like a trap door. So set up auto-pay or reminders. You don’t want to start this process over.

How Long Do You Need to Carry It?

Most states require you to maintain an SR-22 for three years. But—and here’s the annoying part—the clock resets if you let the policy lapse. So, if you have it for two years and then miss a payment, you might have to start the three-year countdown all over again. Yeah, it’s a pain. But it’s also a good motivator to stay consistent.

Some states, like Virginia or Texas, have shorter periods. Others, like New York, might require longer for serious offenses. Check with your state DMV or a local agent to be sure.

What’s Not Covered? (And Why That Matters)

Non-owner SR-22 insurance isn’t a magic shield. It won’t cover:

  • Damage to the car you’re driving—that’s the owner’s problem, usually.
  • Your own medical bills—unless you add medical payments coverage (which is optional).
  • Rental cars—well, it might cover liability, but not the rental company’s damage waiver. You’d still need their insurance.
  • Rideshare driving—if you drive for Uber or Lyft, this policy won’t cover you during those trips. You’d need a commercial policy.

So, it’s a bare-bones policy. It’s not meant to be comprehensive—it’s meant to keep you legal. That’s it.

How to Get Non-Owner SR-22 Insurance: A Step-by-Step Guide

Alright, let’s walk through this like a normal person would. No rush.

  1. Check your state’s requirements. Go to your DMV website or call them. Find out the exact liability limits you need (usually 25/50/25, but it varies).
  2. Find an insurer that offers non-owner policies. Not all companies do. Big names like Progressive, State Farm, and GEICO often have them. Smaller regional insurers might too.
  3. Get quotes. Be upfront about your driving record. Lying about a DUI will come back to bite you when they run your MVR.
  4. Buy the policy and request the SR-22 filing. The insurer will handle the paperwork and send it to the DMV electronically. You might pay a small fee.
  5. Keep proof of insurance with you. Even if you don’t have a car, carry the ID card. You never know when you’ll need it—like if you get pulled over in a borrowed car.

And that’s it. The whole process can take a few days, sometimes less if the insurer is quick.

Common Myths About Non-Owner SR-22 Insurance

Let’s bust a few, because I’ve heard some wild ones.

Myth #1: “It’s the same as a regular SR-22.”
Nope. A regular SR-22 is attached to a car insurance policy. Non-owner SR-22 is a standalone policy for people without vehicles. Different coverage, different cost.

Myth #2: “I can just get a friend to add me to their policy.”
That might work temporarily, but it’s not a long-term solution. Plus, if you’re the one who needs the SR-22, the policy has to be in your name. A friend’s policy won’t satisfy the DMV requirement.

Myth #3: “Once I get a car, I can just cancel the non-owner policy.”
Well, yes—but you’ll need to switch to a standard auto policy with an SR-22 attached. Don’t cancel the non-owner policy until the new one is active. Otherwise, you’ll have a gap, and that’s a problem.

A Few Final Thoughts—No Pressure

Look, needing an SR-22 isn’t the end of the world. It’s a bump in the road—literally. But non-owner SR-22 insurance gives you a way to stay legal, drive when you need to, and eventually move on. It’s like a probation period for your driving record. Once those three years are up, you can usually drop the SR-22 and get a regular policy. And honestly, that feels pretty good.

So, if you’re in this situation, don’t panic. Call a few insurers, ask questions, and get that filing done. You’ll be back on the road—legally—before you know it.